Controller guide
On Alpha 4.5 and newer, we switched to using an XInput-compliant input system.
Due to these changes, not all controllers (such as gamepads, dance pads, and other rhythm game-specific controllers) are guaranteed to function with 5.3 out of the box (even if they were supported on earlier versions), unless a controller mapping profile has been created for that specific controller.
We would like to thank Josen Tiamat for writing these new instructions for how to configure your controllers for use on 5.3.
Step 1: Things to check for first
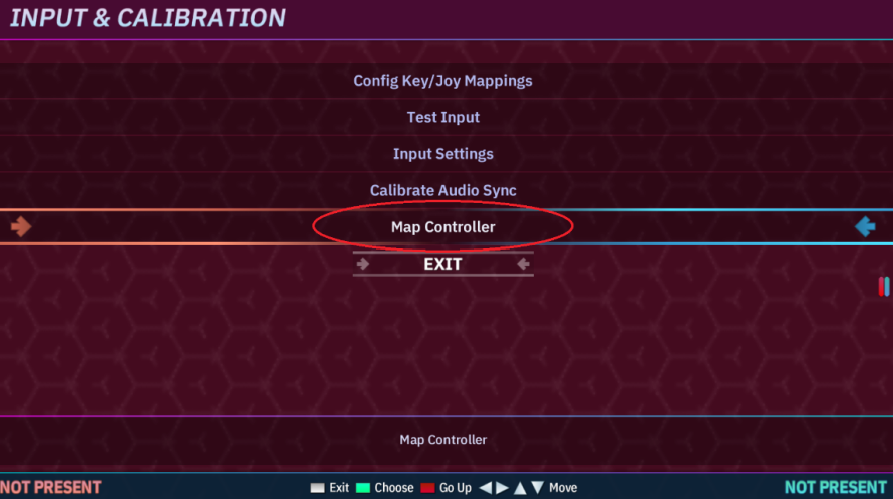
So you started up the game and boom you go to “Config Key/Joy Mappings” and set up your controller, skip this guide because you’re done with what you need to do.
You can’t configure your Config Key/Joy Mappings! OH NO! (I will get to this)
Test your input, see if your keys are mapped and if so which ones. By pushing the buttons on the pad it’ll say something to the effect of “Key B 12 – Not Mapped” and if you step/press on the key and nothing shows up it’s not mapped, no big proceed to the next step to set it up.
Step 2: The Easy Way
So on to the good stuff; 5.3 has a built in gamepad tool that will automatically take care of most of this for you
You push “Enter” on the keyboard and push the appropriate button on the dance pad/etc. to map the buttons to the button you want.
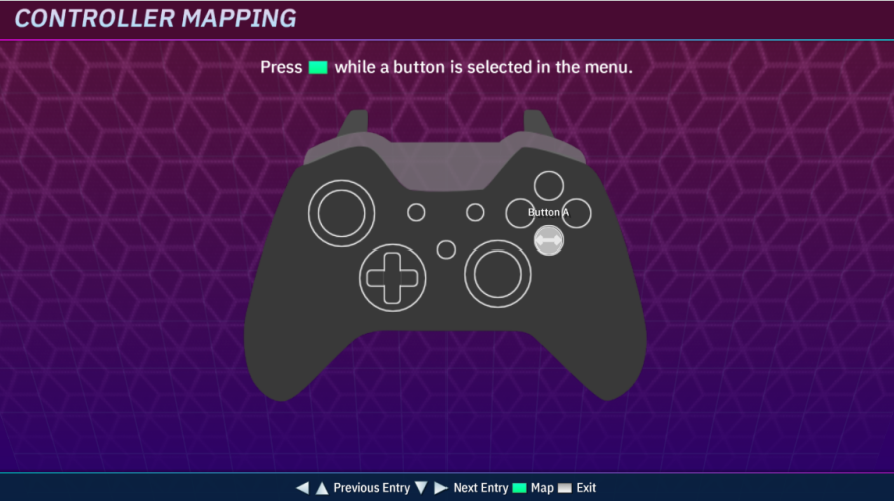
I would recommend using this screen for most controllers on pc, it takes a lot of the guess work out of the whole thing. After setting this up repeat Step 1 if your keys show up as “Unmapped” that’s great go to the “Config Key/Joy Mappings” and do your thing, you’re done with the guide!
If it still doesn't work...
Step 3: The not super intuitive way (SDL2 Gamepad Tool)
There is a nifty tool around called SDL2 Gamepad Tool. You connect your controller (via USB or Bluetooth or however you desire to connect your controller to the PC), and it’ll show up on the top drop down menu.
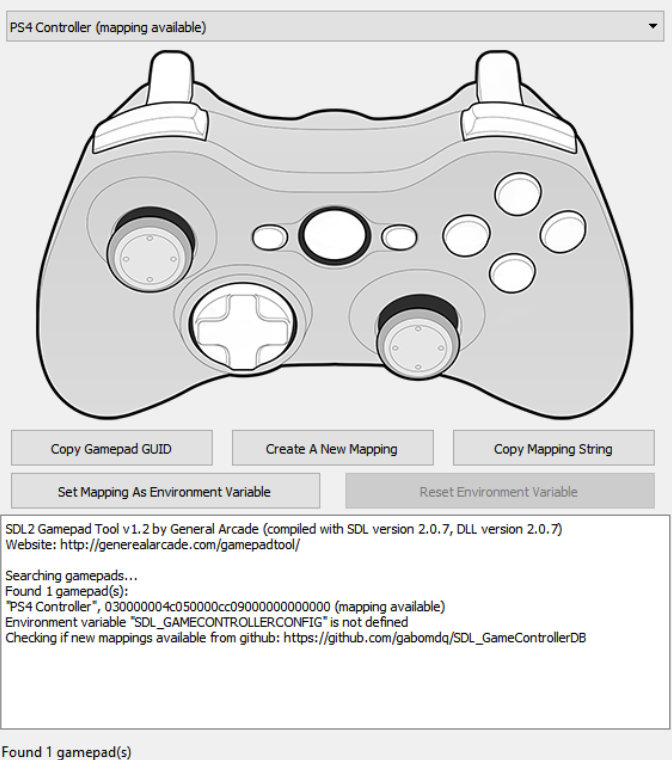
- Click "Create a New Mapping"
- Step/Press the input you want for those buttons much like you would on Step 2 of this procedure.
- Skip the rest.
- Save the Mapping String.
- Copy the Mapping String.
- Go to where you installed the game, and paste the string into Data/gamecontrollerdb.txt
A note
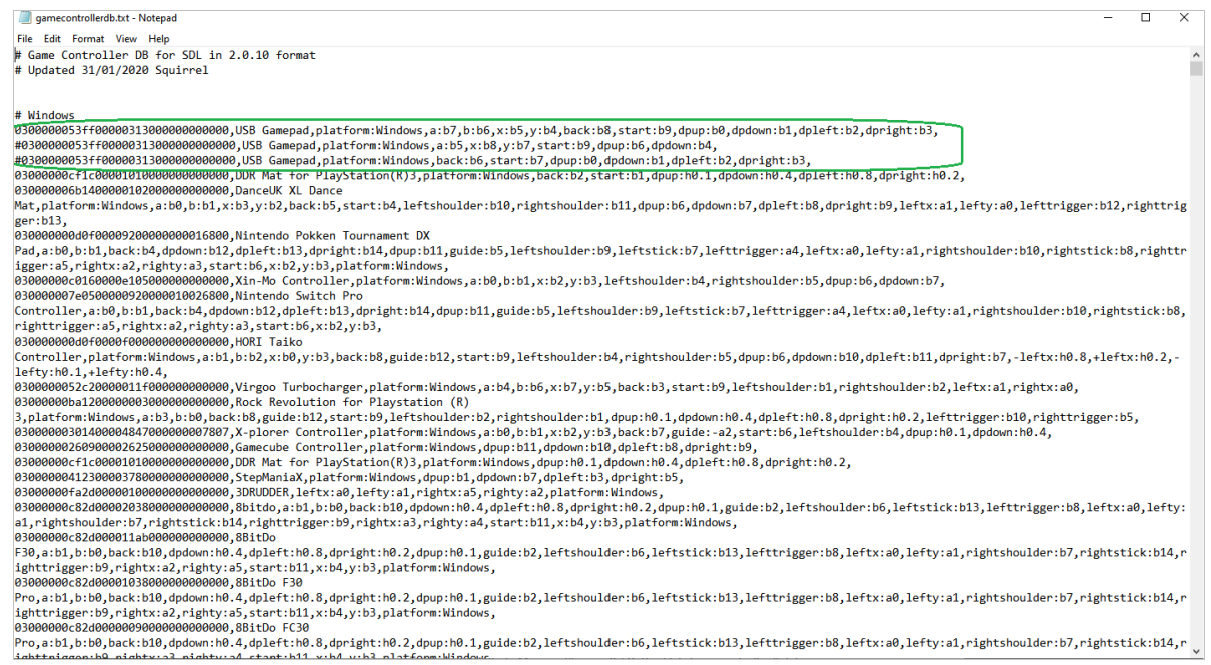
The “#” is useful for when you want to have different Mapping Strings for the same gamepad, it basically hides the mapping string from the program reading it. I made 3 different mapping for testing the the program would only recognize one, then I hid the mapping string with a hashtag (pound symbol for you oldies around) and the one not hidden was now seen by the program.
Basically, don’t do multiple mapping strings on the same controller (even if you change the name); the program will work with one at a time and honestly one is all you need. You should be good to go and repeat Step 1 and then go to “Config Key/Joy Mappings” right after and set up your pad.
Still isn't working?
This hasn’t quite happened to me (I tried with the PS3 DDR mat) but there are 2 types of controllers, a “Hat” type and not. So let’s say for example you hook up a pad/controller and the Dpad you configured up down left and right but “Config Key/Joy Mappings” only allows you to push one of them and the rest don’t work.
Try configuring the directions to the analog stick instead and then mapping them again. I don’t think you should have to but it works, I’ve tested this with my PS4 Controller and in fact you can play with analog input.
XInput interfering with HIDAPI mode, and breaking axis pads
If you have an axis pad which is showing two sets of buttons, or simply just cancelling out, and you cannot seem to map it in game, this is what you need to do to fix it. The pad showing two buttons will look like this:

I am pressing the left Arrow, but getting two sets of inputs. On Linux and MacOS, this can be due to an installed xbox360 driver, or the xpad module intercepting the events, and reporting an axis anyway. The next patch of OutFox mitigates this issue a little bit, but it still is a pain.
To fix this, you need to write down the BUTTON numbers shown on screen, so you get a list for all four arrows:
Down=Joy1_Button 2
Left=Joy1_Button 1
Right=Joy1_Button 4
Up=Joy1_Button 3
Make sure that you close the game. You can now navigate to your save folder, and look for your keymaps.ini file and set the buttons manually, so you can basically ignore the axis values given by the xpad driver. you need to add the mapping before the ::: as shown below:

You can save this, and then start the game again, and your pad will be mapped.
Project OutFox is an extensible rhythm game engine based on StepMania, featuring 18 different modes simulating different dance, instrument, and key-based rhythm games.
Its goal is to create a cross-platform “sandbox” and “museum” for the genre, supporting over 20 years worth of content across a variety of formats.
Latest stable version (2023-04-15):
Project OutFox 0.4.19 LTS